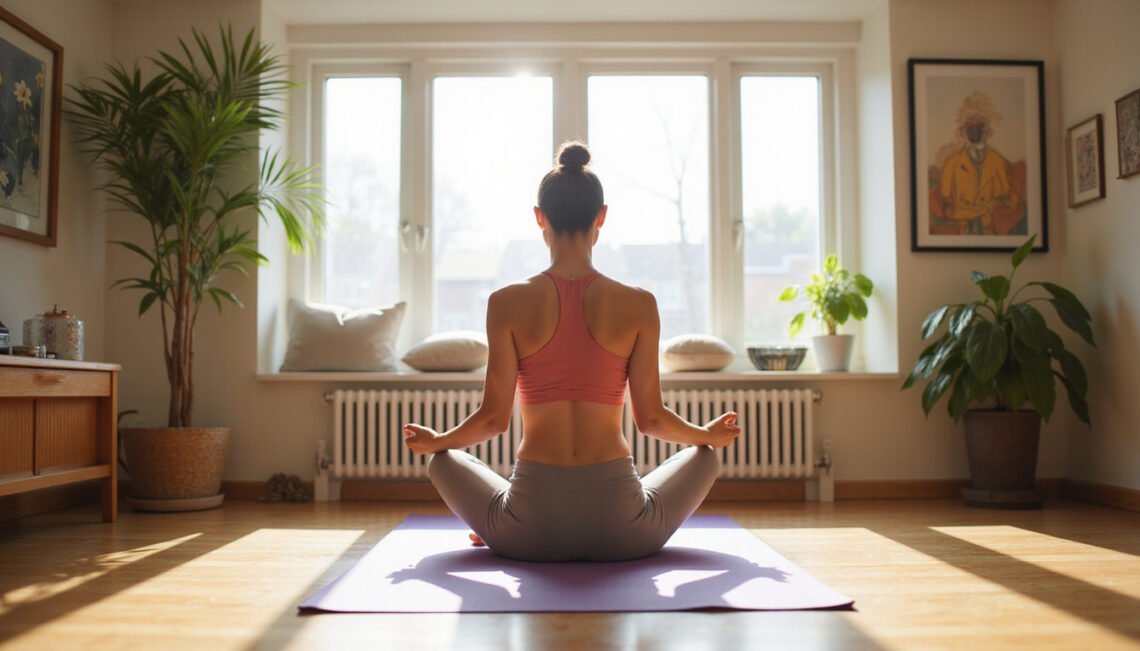
Glute Stretches At Home: 7 Quick Moves to Relieve Pain
Tight hips and aching lower backs are often the result of neglected glute muscles. Building a simple routine of effective glute stretches can dramatically reduce pain, improve mobility, and support better posture—all without leaving your living room. With just a few minutes a day, you can loosen stiff hips and glutes, decrease strain on your lower back, and move more comfortably throughout your day.
Below are seven quick, beginner-friendly glute stretches you can do at home, plus tips on how to do them safely and consistently.
Why Your Glutes Get Tight (and Why It Matters)
Your glute muscles (gluteus maximus, medius, and minimus) play a major role in:
- Stabilizing your hips and pelvis
- Supporting your lower back
- Powering walking, standing, and lifting
Common reasons your glutes feel tight or sore:
- Prolonged sitting (desk work, driving, TV)
- Overuse from running, cycling, or heavy lifting
- Muscle imbalances in hips, hamstrings, and lower back
- Poor posture or weak core muscles
When your glutes are tight, the body compensates. Your lower back, hamstrings, or hip flexors often take on extra work, increasing your risk of pain and injury. Regular glute stretches help restore balance so your body can move the way it’s designed to.
How to Stretch Safely Before You Start
Before diving into the at-home glute stretches, keep these basics in mind:
- Warm up for 2–3 minutes: March in place, walk around, or do gentle hip circles to increase blood flow.
- No bouncing: Hold each stretch steadily; avoid jerky movements.
- Breathe deeply: Inhale through the nose, exhale through the mouth. Exhalation helps muscles relax.
- Stay in the “good stretch” zone: Mild to moderate tension is fine; sharp or pinching pain is not.
- Hold 20–30 seconds: Repeat 2–3 times per side for best results.
If you have a history of hip, knee, or lower back injury, talk with a healthcare provider before starting a new routine (source: Mayo Clinic).
1. Seated Figure-4 Stretch (Chair Glute Stretch)
This is one of the most accessible glute stretches you can do at home, especially if you sit a lot.
How to do it:
- Sit tall on the edge of a sturdy chair, feet flat on the floor.
- Cross your right ankle over your left knee, creating a “figure-4” shape.
- Flex your right foot to protect your knee.
- Gently press your right knee down toward the floor.
- Keeping your back straight, hinge forward slightly from your hips until you feel a stretch in your right glute and outer hip.
- Hold 20–30 seconds, breathing deeply.
- Switch sides.
Tips:
- If the stretch is too intense, scoot slightly back in the chair and hinge less.
- For more intensity, lean a bit further forward while keeping your spine neutral.
2. Lying Figure-4 Stretch (Supine Piriformis Stretch)
This stretch targets the glutes and the piriformis, a deep muscle that can contribute to sciatic-like pain when tight.
How to do it:
- Lie on your back with knees bent and feet flat.
- Cross your right ankle over your left thigh, just above the knee.
- Reach your hands behind your left thigh and gently pull your leg toward your chest.
- You should feel a stretch in your right glute and outer hip.
- Keep your head and shoulders relaxed on the floor.
- Hold 20–30 seconds, then switch sides.
Tips:
- If you can’t reach behind the thigh comfortably, use a towel or yoga strap around the leg.
- Keep your low back neutral—avoid overarching or pushing it hard into the floor.
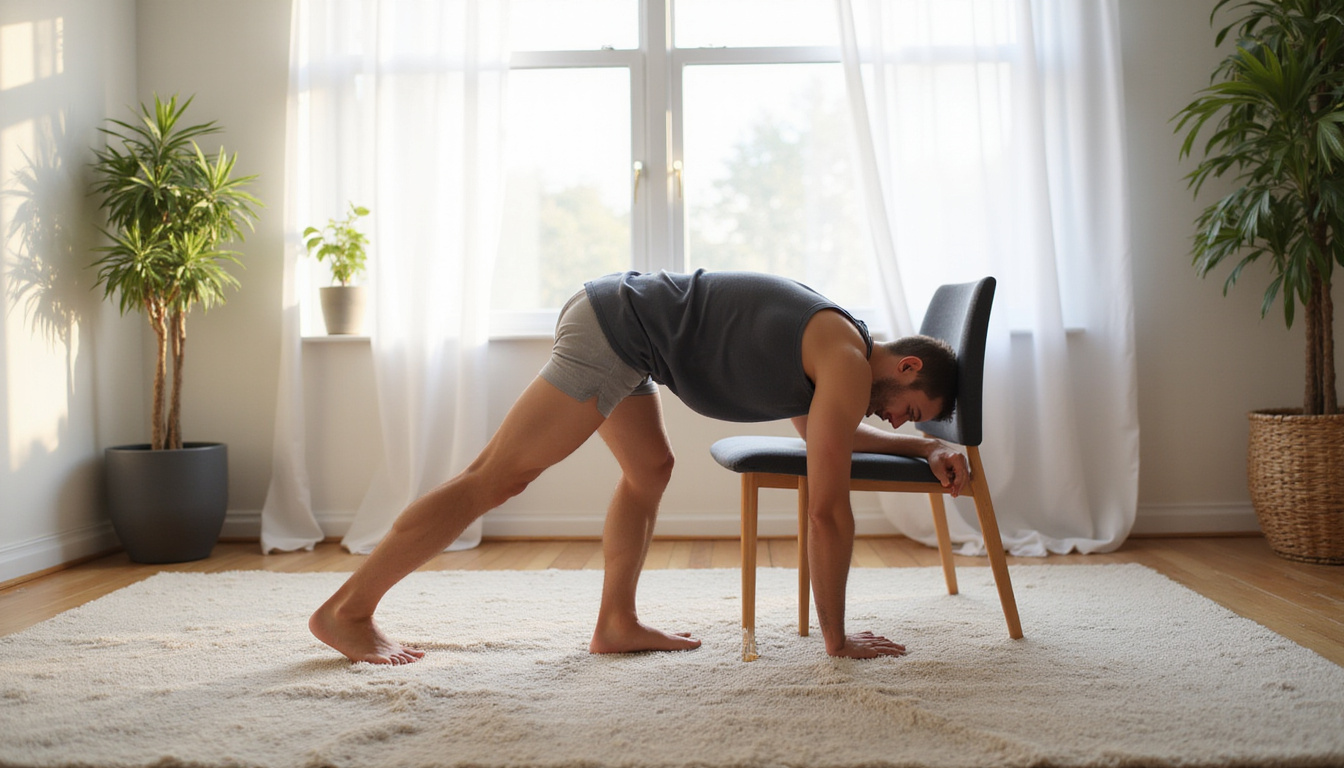
3. Pigeon Pose (Modified for Home)
Pigeon pose is a classic hip-opener that deeply stretches the glute muscles and hip rotators. You don’t need to be super flexible; modified versions work just as well.
How to do it (floor version):
- Start on all fours (hands under shoulders, knees under hips).
- Bring your right knee forward toward your right wrist.
- Place your right shin diagonally in front of you, with your right foot near your left wrist.
- Extend your left leg straight back behind you, top of the foot resting on the floor.
- Keep your hips squared toward the front.
- Walk your hands forward and gently lower your torso toward the floor, stopping where you feel a strong but comfortable stretch in the right glute.
- Hold 20–30 seconds, then gently switch sides.
Chair modification:
- Place your shin across a firm chair seat (similar to the floor shape) and hinge forward from the hips instead of going down to the floor.
Tips:
- Use pillows or folded blankets under the front hip or glute for support if you feel off balance.
- Avoid if you have knee pain or recent hip surgery unless cleared by a professional.
4. Standing Cross-Leg Forward Fold
If you want glute stretches you can slip into a busy day without getting on the floor, this is a great option.
How to do it:
- Stand tall, feet hip-width apart.
- Cross your right leg behind your left leg.
- Keeping both legs straight (but not locked), hinge at the hips and slowly fold your torso forward.
- Let your arms dangle or rest your hands on your front shin, a block, or a chair.
- You should feel a stretch in your left outer hip and glute.
- Hold 20–30 seconds, then switch the cross of your legs.
Tips:
- If your hamstrings are tight, bend your knees slightly.
- Keep weight evenly distributed through both feet.
5. Knees-to-Chest Glute Stretch
This simple move gently stretches the lower back and glutes. It’s especially helpful after a long day of sitting or standing.
How to do it:
- Lie on your back with legs extended.
- Bring your right knee toward your chest.
- Wrap your hands around your shin or behind the thigh.
- Gently pull the knee closer to your chest until you feel a stretch in the right glute and low back.
- Keep your left leg straight or bent with the foot on the floor—choose what feels more comfortable.
- Hold 20–30 seconds, then switch sides.
Double-knee variation:
- Bring both knees into your chest at once and gently rock side to side to massage the lower back.
6. 90/90 Hip Stretch
The 90/90 stretch targets the glutes and hip rotators in a seated position. It’s excellent for improving hip mobility and easing stiffness.
How to do it:
- Sit on the floor with your right leg in front of you, knee bent at 90 degrees, shin parallel to your torso.
- Position your left leg to the side, also bent at 90 degrees behind you.
- Square your chest over your front shin.
- Keeping your back straight, hinge forward slightly over your right leg until you feel a deep stretch in your right glute and outer hip.
- Hold 20–30 seconds.
- Slowly switch sides so your left leg is in front and right leg is behind, then repeat.
Tips:
- If your hips are tight, place a cushion under your front glute.
- Go slowly—this can be intense at first but becomes easier with consistency.
7. Wall-Assisted Glute Stretch
If you need extra support or don’t want to lie fully flat, this wall-supported glute stretch is a gentle, controlled option.
How to do it:
- Lie on your back with your hips a few inches away from a wall.
- Place your feet on the wall, knees bent at about 90 degrees.
- Cross your right ankle over your left knee (figure-4).
- Gently press your right knee away from you to deepen the stretch in the right glute.
- To intensify, scoot your hips a little closer to the wall.
- Hold 20–30 seconds, then switch sides.
Tips:
- Adjust your distance from the wall to find a comfortable stretch level.
- This is ideal if you have trouble holding your leg up in the traditional lying figure-4 stretch.
A Simple 5-Minute At-Home Glute Stretch Routine
To get started, you don’t need to do every single move daily. Pick a short sequence that fits your time and comfort level. For example:
- Seated figure-4 stretch – 20–30 seconds each side
- Lying figure-4 stretch – 20–30 seconds each side
- Knees-to-chest stretch – 20–30 seconds each side or double-knee variation
- Standing cross-leg forward fold – 20–30 seconds each side
You can complete this routine in about 5 minutes, once or twice a day. As your flexibility improves, incorporate pigeon pose or the 90/90 hip stretch for a deeper release.
How Often Should You Do Glute Stretches?
For lasting relief and improved mobility, consistency matters more than intensity.
- For pain relief: Aim for 5–10 minutes of glute stretching daily.
- For maintenance: 3–4 sessions per week may be enough once symptoms improve.
- Before workouts: Use dynamic movements (like leg swings or bodyweight squats) to warm up; save longer static glute stretches for after your workout.
If stretching causes increased or radiating pain down your leg, stop and consult a healthcare professional.
FAQs About Glute Stretches and Hip Pain
1. What are the best glute stretches for lower back pain?
Gentle options like lying figure-4, knees-to-chest, and wall-assisted glute stretches are often best for lower back discomfort because they relieve tension in the glutes and piriformis without demanding much from the spine. Always move slowly and stop if your back pain worsens.
2. Can glute stretch exercises help with sciatic nerve pain?
Tight glutes and piriformis muscles can irritate or compress the sciatic nerve in some people. Targeted glute stretch exercises—such as supine figure-4, pigeon pose, and the 90/90 stretch—may help reduce pressure and improve symptoms. If you have confirmed sciatica, check with a physical therapist for a tailored plan.
3. How long should I hold glute muscle stretches to see results?
For most adults, holding glute muscle stretches for 20–30 seconds, repeating 2–3 times per side, is effective. Over several weeks of consistent practice, you should notice better flexibility, easier movement, and reduced tightness. Avoid rushing; slow, steady stretching is more beneficial than sporadic, intense sessions.
Regularly incorporating these at-home glute stretches into your routine can ease hip and lower back pain, improve posture, and help you move with more freedom and confidence. Start with just a few minutes a day, choose the stretches that feel best for your body, and build from there.
If you’re ready to feel less stiff and more mobile, pick three of the stretches above and do them today. Then, commit to repeating your mini routine daily for the next two weeks. Your hips, back, and whole body will thank you—and you’ll have built a powerful, pain-relieving habit you can do anytime, right at home.