For athletes looking to get back in the game quickly, kinesio taping has become a go‑to recovery tool. You’ve likely seen brightly colored strips of tape on shoulders, knees, and calves in every major sport, from track and field to basketball. But how does it actually work, and which kinesio taping techniques do athletes rely on for faster injury recovery?
This guide walks through the science, the most common applications, and practical tips so you can use kinesio taping more effectively—whether you’re an elite competitor, a weekend warrior, or simply trying to move with less pain.
What is kinesio taping and how does it help recovery?
Kinesio taping is a therapeutic technique that uses elastic cotton tape to support muscles and joints without limiting range of motion. Unlike rigid athletic tape, kinesiology tape stretches—often up to 140–180% of its original length—to move with your body.
Athletes and clinicians use kinesio taping to:
- Reduce pain and discomfort
- Support injured or unstable joints
- Decrease swelling and bruising
- Improve posture and movement patterns
- Enhance body awareness (proprioception)
The basic science behind kinesio taping
Research is still evolving, but several mechanisms are widely accepted:
- Skin lifting effect: The tape slightly lifts the skin, creating more space in the superficial tissues. This can improve local blood flow and lymphatic drainage, helping reduce swelling and pressure on pain receptors.
- Neurological input: The tape stimulates skin receptors, which can modulate pain signals and enhance proprioception—your body’s sense of position and movement.
- Mechanical guidance: When applied in specific directions and tensions, kinesio taping can gently encourage certain movement patterns or discourage harmful ones (like excessive inward knee collapse).
While not a magic fix, kinesio taping is often a helpful complement to rehab, strength work, and rest. Some studies show modest benefits for pain and function when used as part of a broader treatment plan (source: National Institutes of Health).
Key principles for effective kinesio taping
Before looking at specific techniques athletes use, it’s important to understand the basic rules of application.
Tape shape and direction
Kinesio taping often uses three main shapes:
- I-strips: Straight strips for general support or along muscle fibers.
- Y-strips: One end splits into two tails to wrap around muscles or joints.
- Fan or web strips: Multiple tails used for swelling and lymphatic applications.
Direction and tension matter:
- Origin to insertion (muscle support): Typically for facilitation (helping a weak or tired muscle activate).
- Insertion to origin (inhibition): Often used to calm overactive or tight muscles.
- Lymphatic direction: From the swollen area toward lymph nodes (for drainage).
Tension guidelines
Most athletes and clinicians follow these rough tension rules:
- 0–10%: Very light, mainly for skin stimulation and lymphatic work.
- 15–25%: Support and proprioceptive cueing without over-restriction.
- 25–50%: More robust support for joints or significant instability.
- 75%+: Rarely used; can irritate skin or restrict motion.
Always apply with no tension on the tape ends (anchors) to reduce skin irritation.
Skin preparation and safety
For best adhesion and safety:
- Clean and dry the skin; remove oils and lotions.
- Trim excess hair if needed.
- Round the tape corners to prevent peeling.
- Rub the tape lightly after application to activate the adhesive (heat helps).
Stop using kinesio taping if you notice:
- Itching, burning, or rash
- Increased pain or swelling
- Numbness or tingling
If you have diabetes, poor circulation, or sensitive skin, consult a medical professional before using kinesio taping.
Top kinesio taping techniques athletes use for faster recovery
Below are some of the most widely used kinesio taping applications in sports, along with what they’re intended to do. These descriptions are for educational purposes; for injuries, work with a licensed physical therapist, athletic trainer, or other qualified professional.
1. Kinesio taping for knee pain and stability
Knee issues—patellofemoral pain, runner’s knee, mild sprains—are common in running, field sports, and court sports. Kinesio taping can offer support and pain relief without bracing the knee rigidly.
Common technique: Patellar tracking support
Goal: Help guide the kneecap (patella) and reduce anterior knee pain.
General steps:
- Cut an I-strip from mid-thigh to just below the knee.
- With the knee slightly bent, anchor the tape above the knee (no tension).
- Apply the tape down along the outside or inside of the knee (depending on the tracking issue) with 15–25% tension.
- Add shorter support strips across the patella if needed, with light tension, to gently “guide” the kneecap.
Athletes often report this helps during squats, stairs, and running by making the knee feel more “aligned” and stable.
2. Kinesio taping for ankle sprains and instability
After a mild to moderate ankle sprain, once acute swelling decreases, athletes frequently use kinesio taping to feel more secure while rebuilding strength and mobility.
Common technique: Ankle support with dynamic movement
Goal: Support the lateral ligaments and provide proprioceptive feedback to prevent re-injury.
General steps:
- Anchor an I-strip below the inside of the foot.
- Apply the tape up and around the heel toward the outside ankle with 25–50% tension, mimicking a stirrup.
- Add a second strip starting on the outside of the foot, crossing under the arch and wrapping up inside, again with moderate tension.
- Use a third strip (if needed) around the lower shin and ankle with light tension for extra stability.
This kinesio taping approach lets athletes cut and change direction with more confidence, without fully restricting the ankle like rigid taping or bracing would.
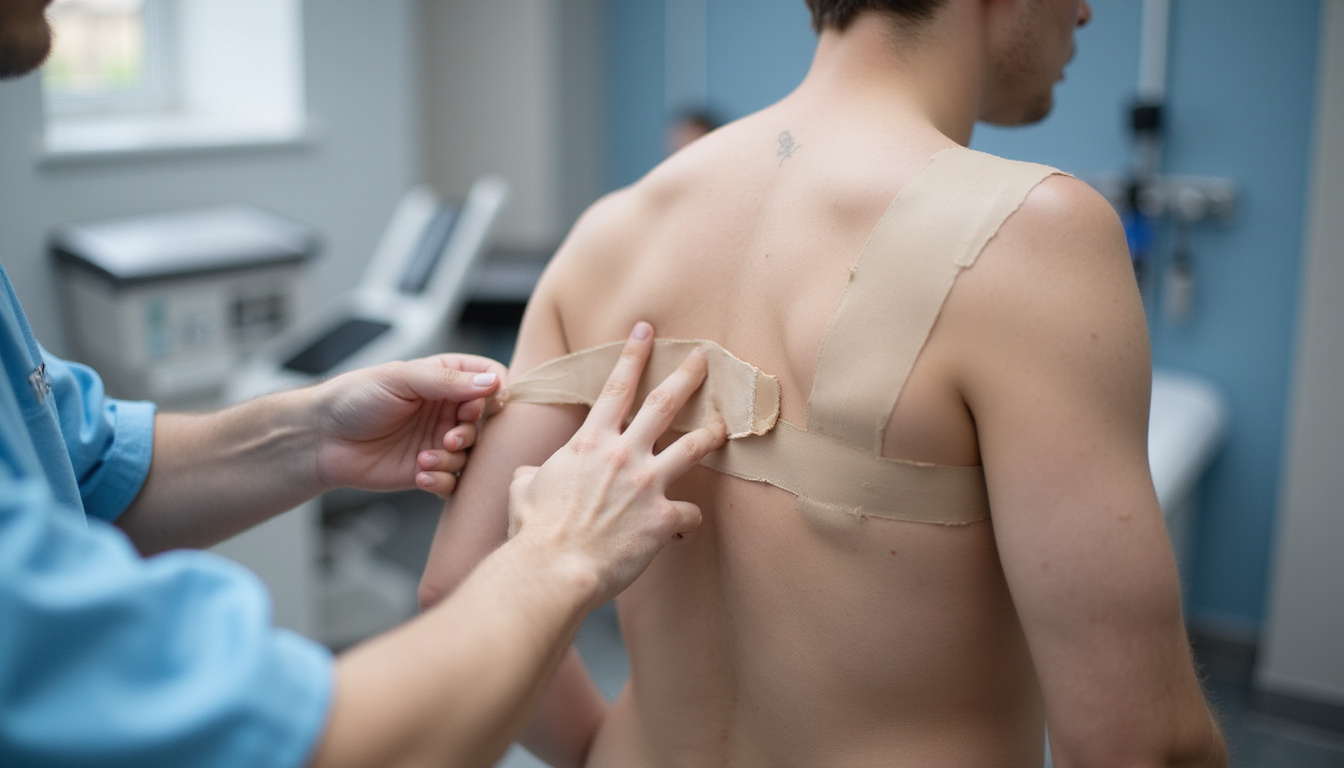
3. Kinesio taping for shoulder pain and rotator cuff support
Overhead athletes—swimmers, pitchers, volleyball players—often deal with shoulder impingement, rotator cuff irritation, or general instability. Kinesio taping can help encourage better shoulder mechanics and reduce strain.
Common technique: Rotator cuff and scapular support
Goals: Reduce pain, cue better shoulder blade positioning, and assist the rotator cuff muscles.
General steps:
- Apply an I-strip from the upper arm (deltoid area) toward the neck, with the shoulder slightly extended and internally rotated; use 15–25% tension over the muscle belly.
- Use a Y-strip from the upper spine or shoulder blade, with the tails wrapping around the top of the shoulder and down the front and back of the arm, following deltoid fibers.
- Apply a stabilizing strip across the top of the shoulder with light tension to support the acromioclavicular (AC) area, if irritated.
Athletes often feel a subtle “reminder” to keep better posture and shoulder position during overhead movements, which can aid both performance and recovery.
4. Kinesio taping for hamstring and quad strains
Sprint and power athletes frequently suffer hamstring and quadriceps strains. Once cleared for movement, kinesio taping can provide gentle support and reduce re-injury risk during the return-to-run phase.
Common technique: Long muscle strip support
Goals: Support the healing muscle, reduce tension at the injured site, and improve circulation.
General steps for a hamstring:
- With the athlete standing and trunk leaning forward (to lengthen the hamstring), anchor the tape just below the gluteal fold (no tension).
- Apply the tape down the back of the thigh toward the knee with 15–25% tension through the center.
- If the strain is localized, add a shorter strip directly over the painful zone with light to moderate tension.
Similar logic applies to the quadriceps: tape from near the hip down toward the knee over the front of the thigh, adjusting anchor points and tension based on the location of pain.
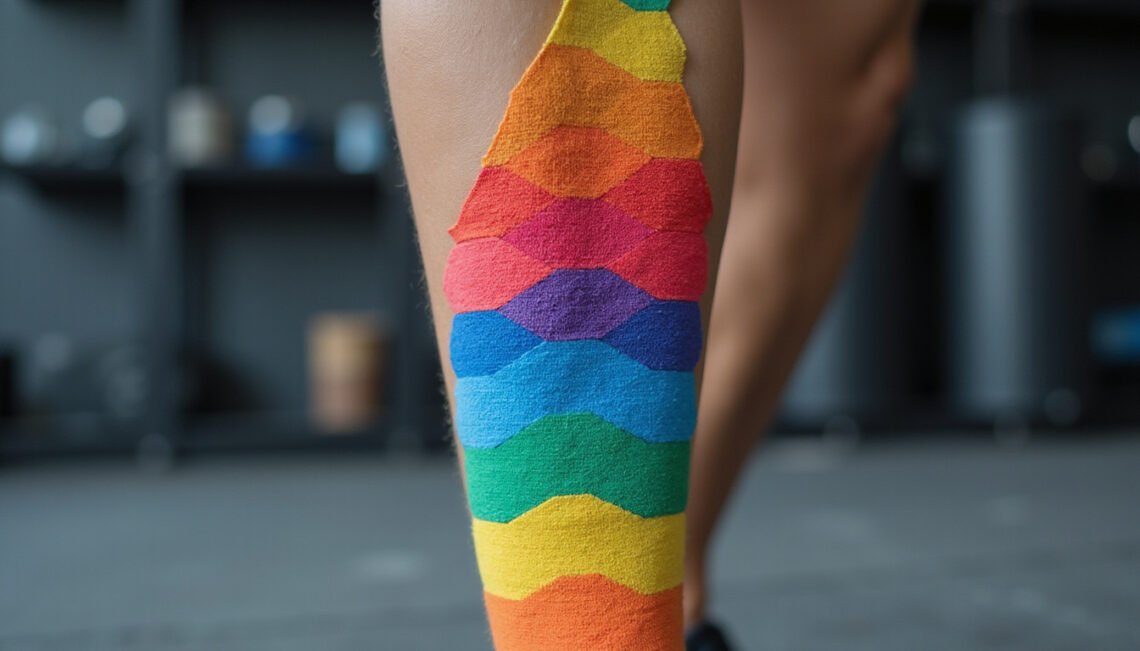
5. Kinesio taping for calf strains and Achilles pain
Runners, soccer players, and basketball athletes often use kinesio taping for tight or strained calves and for mild Achilles tendon issues.
Common technique: Calf and Achilles assist
Goals: Decrease load on the tendon, improve proprioception, and support the calf complex.
General steps:
- Anchor the tape at the heel, just under the foot, with the ankle in slight dorsiflexion (toes up).
- Apply the tape up the back of the calf toward the knee with 15–25% tension.
- For Achilles focus, add a narrower strip directly over the tendon, from heel to lower calf, with light to moderate tension.
This taping is often used alongside eccentric calf exercises and mobility work in a comprehensive rehab program.
Practical tips to get more from kinesio taping
To maximize the benefits of kinesio taping in your own training and recovery, keep these points in mind:
-
Use it as a tool, not the whole solution
Kinesio taping works best when combined with targeted rehab exercises, strength training, and appropriate rest. -
Test and adjust
Every body is different. Some athletes respond well to light tension, others prefer more support. Start conservative and adjust with guidance from a professional. -
Apply before activity
Put the tape on at least 30 minutes before training or competition to allow the adhesive to set. -
Respect pain signals
If kinesio taping enables you to move in ways that significantly worsen pain during or after activity, reassess your training load and seek professional advice. -
Follow removal best practices
Peel tape slowly in the direction of hair growth, holding the skin down with the other hand. Use warm water or an adhesive remover if needed to protect the skin.
A quick checklist for athletes using kinesio taping
Use this simple checklist whenever you apply kinesiology tape:
- Skin clean, dry, and (if needed) hair trimmed?
- Tape edges rounded?
- Anchors applied with zero tension?
- Correct tension range for your goal (light for lymphatic/pain, moderate for support)?
- Joints positioned appropriately (often in a stretched or functional position)?
- Tape rubbed to activate adhesive?
- No immediate itching, burning, or excessive tightness?
If you can say “yes” to all of these, you’re off to a solid start.
FAQ: kinesio taping and athletic recovery
1. Does kinesiology taping really work for sports injuries?
Evidence suggests kinesiology taping can provide short-term pain relief and functional improvements for some conditions, especially when used alongside exercise therapy and rehab. It’s not a cure, but many athletes find it helpful as part of a comprehensive treatment plan.
2. How long should I leave kinesio taping on after an injury?
Most kinesio taping applications can stay on for 3–5 days, including during showers and light activity. Replace it sooner if it starts peeling, irritates the skin, or gets overly sweaty and dirty. Give your skin a break between applications if you tape the same area regularly.
3. Can I use kinesio taping for muscle soreness and prevention, not just injuries?
Yes. Many athletes use kinesio taping variations for muscle support, posture correction, and movement cueing, even when they’re not injured. It can help remind your body to move more efficiently and may reduce fatigue in high-demand sports—though it’s still crucial to prioritize proper training, technique, and recovery habits.
Use kinesio taping as a strategic edge in your recovery
Kinesio taping won’t replace smart training, solid rehab, and adequate rest—but it can be a powerful assistant when used correctly. From knee stability to shoulder mechanics, the right kinesio taping techniques can reduce pain, enhance body awareness, and give you the confidence to move again while you heal.
If you’re dealing with pain or coming back from an injury, don’t guess. Schedule a session with a sports physical therapist, athletic trainer, or other qualified clinician who understands both your sport and kinesio taping. Ask them to show you taping strategies tailored to your body and your goals, so you can return to performance faster, safer, and stronger.