Stability Ball Exercises to Sculpt Core, Improve Balance, and Posture
If you’re looking for an inexpensive, versatile tool to transform your workouts, a stability ball deserves a permanent spot in your routine. This simple piece of equipment can help you sculpt your core, improve balance, and correct posture—whether you train at home, at the gym, or even in your office.
Below you’ll find a complete guide to why the stability ball works so well, how to choose the right size, and a set of safe, effective exercises to build a stronger, more stable body.
Why a Stability Ball Is So Effective
The big advantage of a stability ball (also called an exercise ball or Swiss ball) is its unstable surface. When you sit, lie, or lean on it, your body has to constantly make small adjustments to keep you from rolling off. Those micro-adjustments recruit more muscles—especially deep core stabilizers—than you would use on a flat, stable bench or floor.
Key benefits include:
- Deeper core activation: The instability forces your abdominals, obliques, and lower back muscles to work harder.
- Better balance and coordination: You train the neuromuscular system to react quickly and efficiently.
- Improved posture: Using a ball can highlight imbalances and teach you to maintain a neutral spine.
- Joint-friendly support: The ball can reduce pressure on wrists, knees, and spine during some movements.
- Versatility: Suitable for strength training, stretching, mobility, and even active sitting.
According to the American Council on Exercise, stability ball use can enhance core strength and spinal stability when used consistently as part of a well-designed program (source: ACE Fitness).
How to Choose and Set Up Your Stability Ball
To reap the full benefits, your stability ball needs to be the right size and properly inflated.
Picking the Right Size
Most brands use your height as a starting point:
- Under 5’0" (152 cm): 45 cm ball
- 5’0"–5’5" (152–165 cm): 55 cm ball
- 5’6"–5’11" (167–180 cm): 65 cm ball
- 6’0"–6’4" (183–193 cm): 75 cm ball
- Over 6’4" (193+ cm): 85 cm ball
A quick fit check: sit on the ball with feet flat. Your knees should be about level with or slightly below your hips, forming roughly a 90-degree angle.
Proper Inflation
- When you sit, you should sink in slightly but not so much that the ball feels squishy.
- A firmer ball = more challenge and less range of motion.
- A slightly softer ball = more contact area and stability, useful for beginners.
Always use a burst-resistant stability ball and keep it away from sharp objects.
Core-Sculpting Stability Ball Exercises
These exercises target the abs, obliques, and lower back. Start with 2–3 sets of 8–12 controlled reps unless otherwise noted. Rest 30–60 seconds between sets.
1. Stability Ball Crunch
Targets: Rectus abdominis (front abs)
- Sit on the ball and walk your feet forward until your lower to mid-back rests on the ball.
- Feet flat, knees bent about 90 degrees, hands lightly behind your head.
- Exhale as you curl your torso up, bringing ribs toward hips.
- Inhale as you lower back down with control, maintaining contact with the ball.
Tips: Avoid pulling on your neck; keep your chin slightly tucked as if holding an egg under it.
2. Stability Ball Roll-Out
Targets: Entire core, especially deep stabilizers
- Kneel on the floor with the ball in front of you.
- Place your forearms on the ball, elbows under shoulders.
- Brace your core and slowly roll the ball forward, extending your body into a straight line from knees to shoulders.
- Pause when you feel your abs working hard but can still control your spine.
- Pull the ball back using your core.
Modification: Shorten the range or keep hips slightly higher at first.
3. Stability Ball Pike
Targets: Lower abs, hip flexors, shoulders
- Start in a high plank with your shins on the ball and hands on the floor under shoulders.
- Brace your core and lift your hips toward the ceiling, rolling the ball toward your hands.
- Aim to stack hips over shoulders if you can keep control.
- Slowly roll back to the starting plank.
Make it easier: Start with a stability ball tuck, bending your knees toward your chest instead of lifting hips high.
4. Stability Ball Russian Twist
Targets: Obliques and rotational core strength
- Sit on the ball and walk out until your upper back and shoulders rest on it, hips lifted, forming a straight line from knees to shoulders.
- Arms extended straight up toward the ceiling, hands together.
- Keeping hips high and glutes engaged, slowly rotate your arms and torso to one side.
- Return to center and rotate to the other side.
Tip: Move slowly; imagine your torso turning as a single unit, not just flinging your arms.
5. Back Extension on the Stability Ball
Targets: Lower back, glutes, and spinal extensors
- Lie face down over the ball with hips centered on top.
- Feet wide, toes on the ground for balance; hands behind head or crossed on chest.
- Let your upper body drape over the ball.
- Engage glutes and lower back to lift your torso until your body forms a straight line.
- Lower slowly to starting position.
Note: This is excellent for balancing all the front-focused ab work and helping with posture.
Stability Ball Moves to Improve Balance and Coordination
These exercises challenge your balance by narrowing your base of support and increasing instability.
6. Stability Ball Wall Squat
Targets: Quads, glutes, balance, and alignment
- Place the ball between your mid-back and a wall.
- Step feet forward so you lean into the ball slightly.
- Feet hip- to shoulder-width apart, toes slightly turned out.
- Slowly squat down, letting the ball roll along your back, until thighs are near parallel.
- Drive through heels to stand.
Balance focus: Keep your weight centered and knees tracking over middle toes.
7. Single-Leg Stability Ball Bridge
Targets: Hamstrings, glutes, and single-leg stability
- Lie on your back with one heel on the ball, other leg extended straight up.
- Arms by your sides for support.
- Press your heel into the ball, squeeze glutes, and lift your hips off the floor.
- Pause at the top, then lower slowly.
Challenge: The ball will try to roll—your job is to keep it steady.
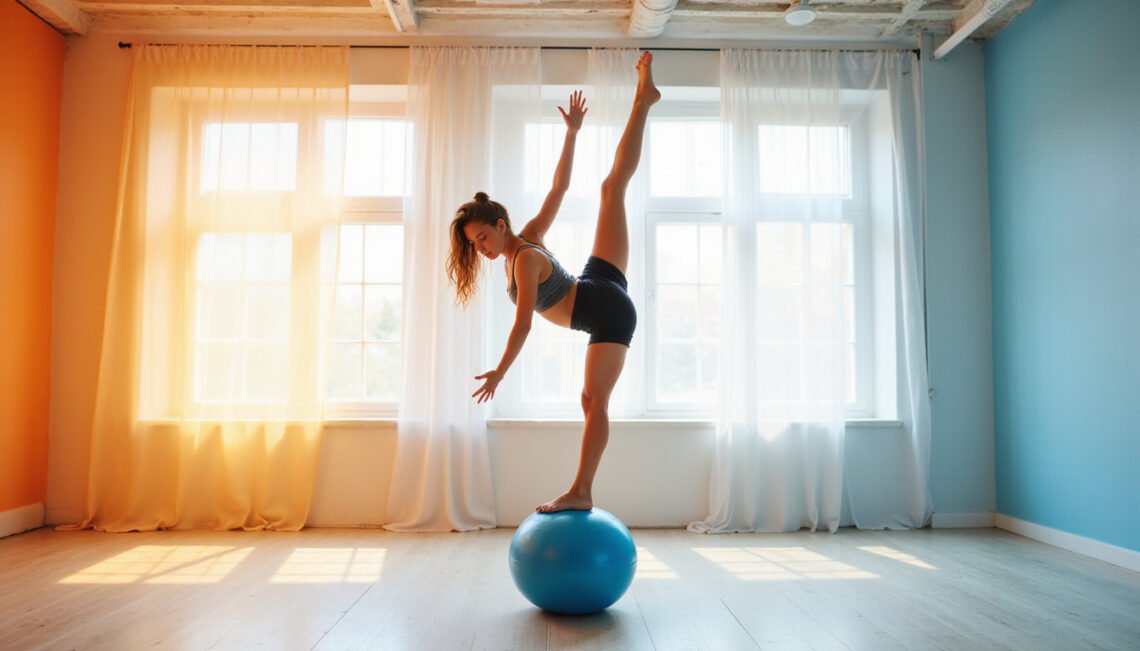
8. Tall-Kneeling Balance Hold on the Ball (Advanced)
Targets: Core, hips, and overall balance
Only attempt if you’re comfortable and have clear space around you.
- Start on your knees behind the ball, hands on top.
- Carefully place one knee at a time on the ball’s top center.
- Try to balance in a tall kneeling position, arms out to sides if needed.
Aim for 10–20 seconds of controlled balance. Step off carefully if you feel unstable.
Posture-Boosting Stability Ball Exercises (and Active Sitting)
Regular use of a stability ball can retrain your body into better posture patterns.
9. Stability Ball Wall Angels
Targets: Upper back, shoulders, posture muscles
- Sit tall on the ball facing away from a wall, with your back just in front of it.
- Lean gently back so your mid- to upper-back touches the wall.
- Raise your arms to a “goalpost” position: elbows bent 90 degrees, backs of hands against the wall.
- Slowly slide arms up and down the wall, keeping contact as much as possible.
This strengthens the upper back and external rotators that help counteract rounded shoulders.
10. Chest Opener Stretch on the Ball
Targets: Chest, shoulders, thoracic spine
- Sit on the ball and walk your feet forward until your upper back and shoulders rest on it.
- Let your arms open wide to the sides, palms up.
- Allow your chest to gently stretch and your upper back to extend over the ball.
- Hold 20–40 seconds, breathing steadily.
Perfect after long hours at a desk or looking down at a phone.
Using a Stability Ball as a Chair: Pros and Cons
Many people use a stability ball as a desk chair to encourage better posture and light core activation.
Potential benefits:
- Promotes “active sitting” and small postural adjustments.
- Can reduce static pressure compared to a rigid chair.
- Reminds you to sit taller and avoid slouching—if you pay attention.
Potential drawbacks:
- No back support; can cause fatigue if you sit too long.
- Not ideal for prolonged daily use for most people.
- Height may not match ergonomic needs at your desk.
A smart approach: alternate between a proper ergonomic chair and short periods (20–30 minutes) on the ball, paying attention to how your body feels.
Sample 20–30 Minute Stability Ball Workout
Use this as a starting template 2–3 times per week.
- Stability Ball Wall Squat – 3 x 10–12
- Stability Ball Crunch – 3 x 12–15
- Stability Ball Roll-Out – 3 x 8–10
- Back Extension on the Ball – 3 x 10–12
- Stability Ball Russian Twist – 3 x 8–10 each side
- Single-Leg Stability Ball Bridge – 2–3 x 8–10 each leg
Rest 30–60 seconds between sets. As it gets easier, slow your tempo, add reps, or progress to more challenging variations like pikes.
Safety Tips When Training With a Stability Ball
- Start simple: Master planks, bridges, and basic crunches before advanced moves.
- Clear your space: Keep the area around you free of obstacles.
- Engage your core first: Think “brace” (like gently tightening a belt) before every rep.
- Control over speed: Move slowly and deliberately; momentum defeats the purpose.
- Pain is a red flag: Discomfort in muscles can be normal; sharp or joint pain is not.
If you have back issues, balance disorders, or are pregnant, consult a healthcare or fitness professional before starting new stability ball exercises.
Quick Reference: Key Stability Ball Moves
Here’s a compact list of foundational exercises you can cycle through:
- Stability Ball Crunch
- Stability Ball Roll-Out
- Stability Ball Pike or Knee Tuck
- Stability Ball Russian Twist
- Back Extension on the Ball
- Stability Ball Wall Squat
- Single-Leg Stability Ball Bridge
- Stability Ball Wall Angels
- Chest Opener Stretch on the Ball
Rotate 4–6 of these into your routine each week to keep training balanced and effective.
FAQ About Stability Ball Workouts
Q1: Are stability ball exercises good for beginners?
Yes. Beginners can start with easier exercises like stability ball wall squats, basic crunches, and bridges. Choose a properly sized, slightly softer ball and keep movements small and controlled while you build confidence and core strength.
Q2: How often should I use a stability ball for core training?
For most people, 2–3 sessions per week of stability ball core exercises are enough to see improvements in strength and posture, especially when paired with regular walking and full-body strength training.
Q3: Can stability ball workouts replace traditional ab exercises?
They can replace many floor ab exercises, and often make them more effective by adding instability. However, a well-rounded core routine can include a mix of stability ball moves, bodyweight exercises, and, when appropriate, resistance training for the trunk and hips.
Start Sculpting Your Core and Upgrading Your Posture Today
A stability ball is one of the most versatile, budget-friendly tools you can add to your fitness arsenal. With just a few square feet of space, you can sculpt your core, sharpen your balance, and retrain your posture—all with low-impact, highly effective exercises.
Pick the right size ball, choose 4–6 moves from this guide, and commit to 20–30 minutes of focused stability ball training a few times a week. Your core strength, confidence, and everyday movement will quickly reflect the change.
If you’d like, tell me your current fitness level and whether you train at home or in the gym, and I can help you build a personalized stability ball routine tailored to your goals.