A pain diary can be one of the most powerful tools you use to understand your symptoms and find lasting relief. Whether you’re dealing with chronic back pain, migraines, arthritis, fibromyalgia, or unexplained aches, learning how to track your pain clearly and consistently can transform your conversations with doctors—and your daily life.
This guide walks you through exactly what a pain diary is, why it works, and how to build a daily tracking routine that you’ll actually stick with.
What is a pain diary and why does it help?
A pain diary is a structured way to record your pain and related symptoms over time. Instead of trying to remember how you felt “last month” at a doctor’s visit, you have concrete, time-stamped data.
A good pain diary typically tracks:
- When pain happens
- Where it hurts
- How intense it is
- What it feels like
- What you were doing before it started or worsened
- What you tried for relief and how well it worked
This kind of documentation helps in several ways:
- Improves medical care: You can give your healthcare provider precise information, which can lead to a more accurate diagnosis and tailored treatment.
- Reveals patterns and triggers: Over time, you may notice that certain foods, activities, stress levels, or sleep patterns consistently affect your pain.
- Measures treatment effectiveness: As medications or therapies change, your diary can show what actually helps.
- Gives you a sense of control: Chronic pain often feels unpredictable. Tracking it can make it feel more understandable and manageable.
According to pain management resources, consistent tracking is a recommended strategy for both patients and clinicians when managing long-term pain conditions (source: Mayo Clinic).
Key elements every pain diary should include
You don’t need a complicated system. A simple pain diary becomes powerful when you consistently capture the right details. At minimum, aim to record the following:
1. Date and time
Always include:
- Date: To track changes over days, weeks, and months
- Time: To see if pain has a pattern (mornings, evenings, after work, etc.)
This helps identify daily cycles, such as pain that worsens in the evening or after extended sitting.
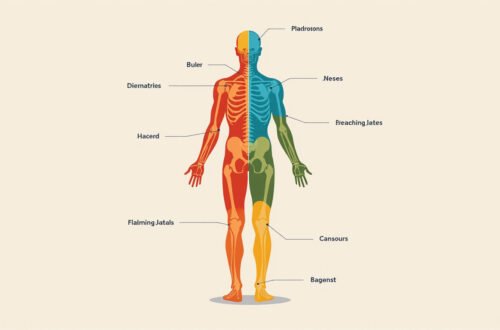
2. Pain location
Be as specific as possible:
- “Lower right back” instead of just “back”
- “Behind left eye” instead of “headache”
- “Right knee, inner side” instead of “leg pain”
You can use simple body maps (stick figures or outline diagrams) and mark areas that hurt. Over time, you may notice pain migrating or expanding—information your doctor needs.
3. Pain intensity
Use a consistent rating scale, such as:
- 0 = No pain
- 1–3 = Mild
- 4–6 = Moderate
- 7–9 = Severe
- 10 = Worst pain you can imagine
Most pain diaries use a 0–10 scale. Rate your pain at the time you’re recording, and, if useful, note:
- Worst pain today
- Least pain today
- Average pain today
This allows you and your provider to see if treatments are lowering your overall pain levels over time.
4. Pain description (quality)
Pain “quality” matters. Note the type of sensation:
- Sharp, stabbing, shooting
- Dull, aching, throbbing
- Burning, tingling, electric
- Cramping, pressure, tightness
Different descriptors can hint at different causes (for example, burning or electric pain may suggest nerve involvement).
5. Triggers and context
What were you doing before the pain started or worsened?
Consider:
- Physical activity (lifting, walking, standing, sitting, exercise)
- Posture (bent over a laptop, looking down at a phone, driving)
- Food or drinks (alcohol, caffeine, certain foods)
- Sleep (poor night, changed schedule, naps)
- Stress (work deadlines, conflicts, anxiety)
- Weather (humidity, cold, storms)
Writing this down can reveal surprising associations—like flare-ups that follow poor sleep or increased pain on cold, rainy days.
6. Medications and treatments
Track both what you take and what you do:
- Medications: name, dose, time taken
- Non-drug treatments: stretching, heat/ice, massage, TENS unit, physical therapy, rest, meditation, breathing exercises
Also note:
- How long it took for relief to start
- How much relief you felt (for example, “pain from 8/10 to 4/10 in 40 minutes”)
- Any side effects you experienced
7. Impact on daily life
Capture how pain affects your functioning:
- Work or school: missed days, reduced productivity
- Household tasks: cleaning, cooking, shopping
- Movement: walking, climbing stairs, driving
- Social life: canceled plans, avoiding activities
- Mood and sleep: anxiety, sadness, waking at night
This helps demonstrate the real-world impact of your pain, which is crucial when discussing accommodations, disability, or treatment changes.
How to start a pain diary that you’ll actually use
A pain diary only works if you keep it up. The key is making the process simple and realistic for your life.
Choose your format
Pick what fits your habits and comfort level:
- Paper notebook or printed template: Easy, portable, no tech required.
- Phone notes app: Convenient; always with you.
- Dedicated pain tracking app: Many offer reminders, charts, and export features.
- Spreadsheet: Good if you like data and graphs.
There’s no “best” option—only what you’ll use consistently.
Set a realistic schedule
You don’t need to log every minute. For most people, this works well:
- Baseline entries: 2–4 times a day (for example, morning, midday, evening, bedtime)
- Extra entries: When pain changes suddenly, worsens, or after trying a new treatment
Keeping entries short (1–3 minutes each) makes it easier to maintain the habit.
Stick to a simple structure
To avoid overwhelm, start with these basic points in every entry:
- Date / time
- Pain location
- Intensity (0–10)
- What you were doing just before
- What you took or did for relief
You can add more details (sleep, mood, triggers) once the base habit is solid.
Example of a simple daily pain diary entry
Here’s a sample entry you can adapt:
- Date: June 13
- Time: 8:30 AM
- Location: Lower back, slightly more on the left
- Intensity: 6/10
- Description: Dull, aching with occasional sharp twinges when bending
- What I was doing: Sitting at desk for 2 hours, minimal breaks
- Possible triggers: Poor sleep (woke up 3 times), stress about work presentation
- Medications/treatments: Took 400 mg ibuprofen at 8:45 AM, used heating pad 20 minutes
- Effectiveness: Pain down to 3/10 by 9:30 AM
- Impact: Moving slowly; delaying morning walk
Even this brief entry provides useful information for you and your provider.
What patterns to look for in your pain diary
After 2–4 weeks of consistent entries, start reviewing for trends. Look for:

- Time-of-day patterns: Does pain peak in the morning, afternoon, evening, or overnight?
- Activity-related patterns: Does sitting, standing, repetitive motion, or specific exercises increase symptoms?
- Trigger connections: Do certain foods, stress levels, or weather changes regularly precede flare-ups?
- Treatment response: Which medications or strategies reliably help? Which don’t seem to make a difference?
- Progress over time: Are peak pain levels going down? Are good days becoming more frequent?
This information can guide:
- Lifestyle changes (adjusting your workstation, modifying exercise)
- Discussions with your doctor about medication type, dose, or timing
- Referrals to specialists like physical therapists, pain clinics, or mental health professionals
Using your pain diary with your healthcare team
Your pain diary isn’t just for your own insight—it’s a communication tool.
Prepare for appointments
Before a visit, quickly review your last few weeks and note:
- Average pain levels and worst days
- New or changing symptoms
- Treatments that helped most and least
- Any concerning side effects
- Specific questions you want to ask
Many apps and spreadsheets can generate charts or summaries you can print or share.
Be honest and specific
When you bring your pain diary to appointments:
- Share exact numbers and examples (“In the last two weeks, I had 5 days with pain at 8/10 or above”).
- Point out consistent triggers or improvements.
- Mention quality-of-life issues, not just pain levels (missed workdays, sleep disruption, mood impact).
This level of detail gives your provider a clearer picture than memory alone ever could.
Tips to avoid common pain diary mistakes
A pain diary should help you, not make life harder. Watch out for these pitfalls:
-
Overcomplicating your entries
Trying to record too many details can become overwhelming and lead you to quit. Start simple and only add more fields if they feel useful. -
Letting perfectionism stop you
Skipping days happens. Don’t abandon the diary because you missed a few entries. Just pick it back up where you are. -
Focusing only on bad days
Record good or low-pain days too. They’re essential for spotting what helps and demonstrating progress. -
Ignoring emotional and mental health
Pain and mood are closely linked. Including notes on stress, anxiety, or low mood can reveal important patterns and help target treatment more effectively. -
Not reviewing your data
Set a regular time (for example, once a week) to skim your entries. Even a 5-minute review can reveal patterns you missed in the moment.
Simple pain diary template you can copy
You can use this as a daily checklist in a notebook, document, or notes app:
- Date:
- Time:
- Pain location:
- Pain intensity (0–10):
- Pain description (sharp/dull/burning/etc.):
- What I was doing before / possible trigger:
- Mood / stress level (0–10):
- Sleep quality (hours + quality 0–10):
- Medication(s) taken (dose/time):
- Non-medication treatments used:
- How well treatments worked (0–10):
- Impact on activities (work, home, social, exercise):
Even if you only fill in half of these fields at first, you’ll still gather valuable information.
FAQ: pain diary basics and common questions
How do you keep a chronic pain diary without it becoming exhausting?
For chronic pain, a simplified pain diary works best. Instead of long paragraphs, use short bullet points and a standard format. Start with just 2–3 entries per day (morning, afternoon, evening) and stick to the same quick questions each time: location, intensity, recent activity, and what helped. You can add more details only when there’s a change—such as a new medication or a severe flare.
Is a daily pain journal really useful for conditions like fibromyalgia or arthritis?
Yes. People with fibromyalgia, arthritis, migraines, and other long-term conditions often find that a daily pain journal helps highlight subtle patterns they wouldn’t remember otherwise. For example, it might show that flare-ups tend to follow stressful days, travel, or disrupted sleep. These insights support more tailored treatment plans, pacing strategies, and lifestyle adjustments to reduce future flares.
What is the best pain log format to share with my doctor?
The best pain log format is the one that’s clear and concise. Many providers appreciate:
- A 0–10 pain scale
- A list or chart summarizing average, best, and worst pain for each day
- Brief notes on activities, medications, and side effects
- A one-page summary for the last 2–4 weeks
Whether you use an app, spreadsheet, or paper, make sure it’s easy to skim so your provider can quickly understand your situation during a short appointment.
Building and maintaining a pain diary is one of the most practical steps you can take toward lasting relief. It doesn’t eliminate pain by itself—but it gives you and your healthcare team the clarity needed to make smarter decisions, adjust treatments, and identify what genuinely helps you feel better.
Start today with the simplest version: jot down the time, where it hurts, how much it hurts (0–10), what you were doing, and what you tried for relief. Keep it going for a few weeks, then review the patterns you see. If you’re ready for more control over your pain story, grab a notebook, open a notes app, or download a tracking tool and create your first pain diary entry now.